
Installing a stair runner is a visually pleasing way to increase the safety and grip of your staircase while also quieting footsteps. The project is not difficult, but it is best handled carefully to keep the runner from loosening over time. Adding a hallway runner adds a decorative element to a space or some extra grip to a walkway.This article will go through every step of installing a stair runner in this in-depth guide, making sure it’s a stylish and useful addition to your house.
1)Gather Your Materials
Getting all the materials together is crucial before beginning the installation process. A stair runner (measured to fit your stairs), carpet padding, a straightedge, a measuring tape, double-sided carpet tape, a staple gun, and safety gear like gloves and safety glasses are required.
2)Measure Your Stairs
The installation of a stair runner must be done correctly, which requires accurate measurements. First, take measurements of each riser’s height and tread width. The length of the runner required can be calculated by adding these measurements. If you want to be sure you have enough material, it’s best to add a few additional inches.
3)Cut the Carpet Padding
Cut the carpet padding to the appropriate length for each stair tread when you have the dimensions. The cushioning helps the runner stick firmly to the stairs and offers extra cushioning. For accurate cuts, make sure the padding is cut to fit the measurements of each stage by using a utility knife and a straightedge.
4)Secure the Carpet Padding
Each piece of carpet padding should have double-sided carpet tape applied to the back before being carefully placed in the middle of each stair tread. Tighten the pressure to provide a stable fastening. In addition to making your steps more comfortable to walk on, the padding also helps reduce noise and shields them from harm.
5)Unroll and Position the Stair Runner
Unroll the stair runner on the first step after the cushioning has been installed. Make sure that each side has the same quantity of extra material. This extra material will be tucked under the stair nosing and fastened afterward.
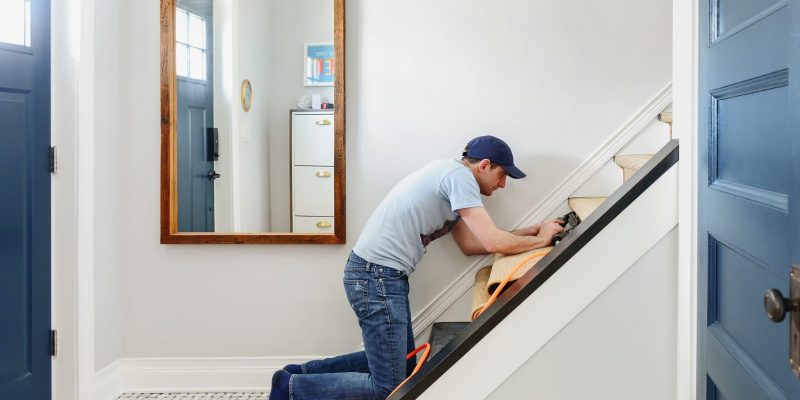
6) Attach The Stair Runner
Utilizing a staple gun, attach the stair runner to the riser directly beneath the nosing, beginning at the bottom of the stairs. Approximately 2 inches should separate each staple along the runner’s width. As you ascend, make sure the runner is centered on the steps.
7)Tuck and Staple
Use a stair tool or putty knife to tuck any extra material beneath the nosing when you get to each step’s nosing. This makes the appearance polished and tidy. After the runner is tucked in, fasten it with more staples along the edge, being careful to space them evenly and discreetly.
8) Continue Installing
Until you reach the top of the steps, repeat the procedure for every step beyond that. Make frequent checks to make sure the runner is centered and straight as you go. Make any necessary alterations before using staples to fasten the runner.
9) Trim Excess Material
After climbing the steps, trim the runner to remove any extra material. For a neat and accurate cut, use a straightedge and a sharp utility knife. Make sure the borders are level and straight by taking your time.
10) Finishing Touches
Proceed to verify the security of the staples one more time before finishing the installation. A carpet seam roller can be used to smooth out any obvious seams or irregularities. Once everything has been neatly and expertly installed, hoover the stair runner to get rid of any remaining fibers or debris.


Comments